Free No Tarmac tools / Lift kits · build & fitment
Lift Kit Advisor
Tell us your rig, terrain and how you drive, and we'll recommend how much lift and which kit suits your build.
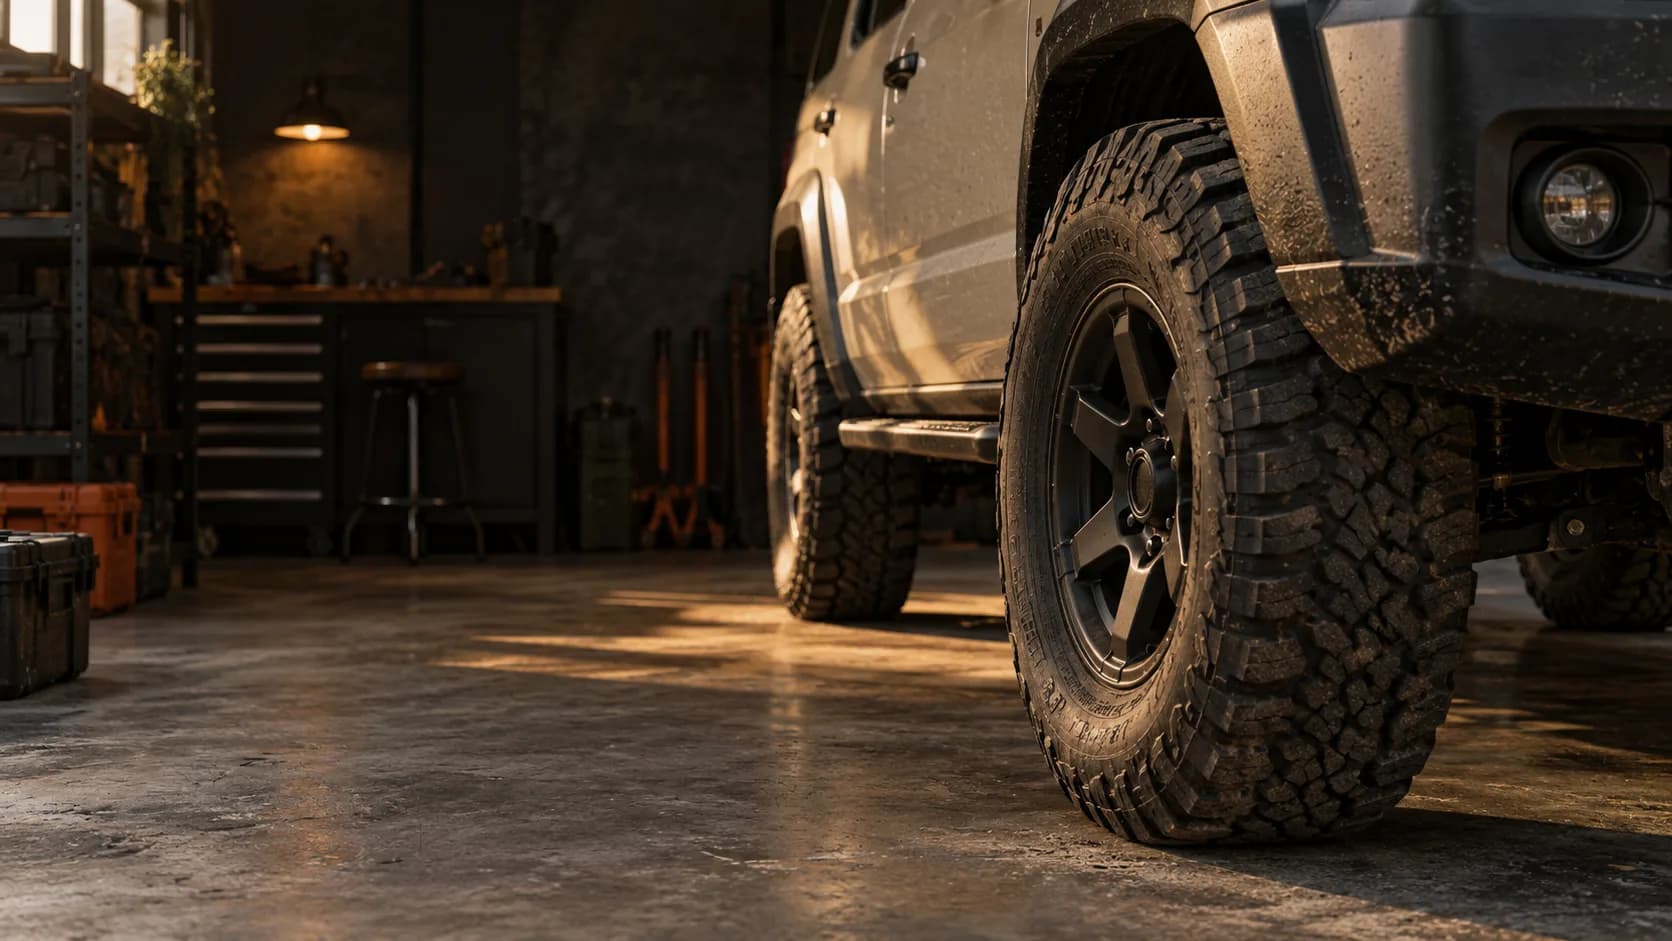
AI-generated representative scene
Quick answer
For most Indian 4x4s a 1–2 inch lift is the sweet spot — it clears slightly larger tyres and mild trails while keeping the ride, handling and paperwork manageable. Three inches and up is specialist territory that needs extra supporting parts. Tell the advisor your vehicle below and it matches a height and kit across 26 lift kits.
Get a lift recommendation in 10 seconds
No forms — tap how you driveWhy we recommend this
- A matched lift makes room for bigger tyres and lifts your bumpers over obstacles — more clearance where it counts.
- Buying it as a complete kit (springs, shocks and the supporting parts) keeps the ride and handling right, not just taller.
- Choosing the height for how you actually drive avoids paying for — and living with — more than you need.
Things to consider
Cost
- A proper kit plus fitting, alignment and any supporting parts adds up — a big lift costs far more than a small one.
- Bigger tyres and wheels usually follow, adding to the bill.
Trade-offs
- More height means a higher centre of gravity, more body roll and worse economy and wind noise.
- Big lifts need extra parts to stay safe and can wear driveline joints faster.
Common beginner mistakes
- Using spacers alone and expecting real articulation.
- Skipping the wheel alignment afterwards.
- Going taller than your terrain actually needs.
Legal
- Raising height beyond standard often needs approval and affects insurance — check before you build.
Get a detailed recommendation
Answer five quick questions for a full match — height, kit type, driveline notes and the legality picture — or compare brands and kits directly.
Choose your path
Start with guidance, compare options, or run the numbers. Your place stays visible.
Guided advisor
Which vehicle?
Fitment and legality vary. Lifts, oversized tyres or wheel changes beyond manufacturer spec may require RTO/ARAI approval and an updated RC, must be disclosed to your insurer, and can affect warranty and roadworthiness. Verify with your RTO, insurer and a qualified fitter before modifying.
Lift heights at a glance
Four tiers — from no-lift to full specialist kit — and who each one is really for. Any visible height change beyond factory spec requires RTO approval and insurer disclosure in India.
Stock / No lift
Better tyres and correct pressures — no height change.
Best for
- Monocoque / unibody vehicles
- Mostly highway and city driving
- Keeps factory geometry, ride, warranty and lowest centre of gravity
Avoid if
- You need real trail clearance or bigger tyres on a ladder-frame 4x4
- Legality
- No change
- Mileage
- No impact
- Tyre gain
- None
Leveling / ~1 inch
Subtle — level the nose, mild clearance.
Best for
- Nose-high factory stance correction
- Often one tyre size up (verify rub at full lock)
- Lowest-risk height change
Avoid if
- Spacers add height, not travel — not for serious trail clearance
- Legality
- Low risk
- Mileage
- Barely affected
- Tyre gain
- Often +1 size
1–2 inch
Sweet spotThe off-road sweet spot for most Indian 4x4s.
Best for
- Daily driver + weekend trails
- +1–2 in tyre diameter (e.g. up to ~33 in on a Thar/Gurkha)
- Better approach, breakover and departure angles
Avoid if
- You need 35 in+ tyres or maximum articulation
- Legality
- RTO needed
- Mileage
- Small drop
- Tyre gain
- ~+1–2 in diameter
3 inch+ (Full kit)
Big tyres, serious articulation — specialist territory.
Best for
- Big tyres + serious articulation and clearance for hardcore trails
- 35 in+ tyres with mandatory supporting mods
Avoid if
- Mostly on-road — economy, wear and legality penalty daily
- Budget is tight — supporting mods are mandatory
- Legality
- RTO + ARAI
- Mileage
- Noticeable drop
- Tyre gain
- 35 in+ territory
Lift & fitment calculator
Enter your current tyre size and the size you want. This estimates the lift you’ll typically need to clear it, and the India legality picture — as a planning guide, not a fitment guarantee.
Current diameter
31.1 in
788.7 mm
Desired diameter
32.6 in
828.2 mm
Diameter change
+1.6 in
+39.5 mm
Needs RTO approval, an updated RC and insurer disclosure in India.
Rule of thumb: plan for roughly the tyre-diameter increase in lift and/or fender trimming to clear at full lock and full suspension travel — actual fitment also depends on rim width, wheel offset/backspacing and arch shape.
Indicative planning only — always verify clearance on your exact vehicle and consult a professional installer. Any lift beyond factory spec needs RTO/ARAI approval and insurer disclosure in India.
Safety, ownership & compliance(install, alignment, legal & warranty)
Geometry checks before lifting
- Caster can shift on lifts of ~2 inches or more — caster-correction bushes or adjustable control arms restore steering feel and straight-line stability.
- On solid-axle vehicles a lift can shift the axle sideways; an adjustable panhard rod re-centres it.
- IFS and solid-axle vehicles have different lift limits and needs — follow platform-specific guidance, not a generic height target.
- Verify wheel offset compatibility — wrong offset affects steering effort, scrub radius, bearing loads and tyre clearance.
Springs, shocks & travel
- Choose spring rate for your permanent accessory load, not just height — matched springs ride and handle better.
- If you tow regularly, choose spring rates for your typical trailer tongue weight and payload, not for lift height alone.
- A lift doesn't automatically add articulation — travel comes from shocks, control arms, bump stops and sway-bar setup working together.
- Match shock design to use (comfort, heat resistance, touring load, or extreme off-road cooling).
- Larger tyres or more travel may need bump-stop adjustment to prevent tyre-to-body contact and over-compression.
Driveline & alignment
Height changes geometry that affects steering, braking and power delivery — professional setup is essential.
- Small lifts slightly steepen CV and propshaft angles; larger lifts (3 inches+) may need differential drops, corrected arms, extended brake lines and possibly a steering stabiliser.
- Get a professional wheel alignment immediately after installation, and have the wheels balanced after fitting larger tyres — many 'death wobble' complaints are actually a balancing problem.
- Where the manufacturer requires it, have steering angle sensors and driver-assistance systems (ABS/ESC/traction control/ADAS) recalibrated after installation.
- Re-torque suspension fasteners after roughly the first 500–1000 km, and re-check alignment after heavy off-road use or impacts.
- Inspect CV/propshaft angles and check brake hoses at full droop and steering lock — they must never stretch, kink or contact moving parts.
Tyres, clearance & economy
- Maximum tyre size depends on offset, travel, steering lock, bump stops and body clearance — verify through full lock and full articulation.
- Larger/heavier tyres and taller lifts reduce economy and increase wind noise and effort — plan for it.
- Check overall vehicle height after installing a lift — especially with roof racks or a roof-top tent fitted — as it affects parking, garages, ferries and low-clearance structures.
- Inspect ball joints, bushes and shocks regularly — they work harder with a lift and bigger tyres.
Legality, insurance & warranty
- Raising ride height beyond the manufacturer's specification generally requires regulatory approval — a vehicle altered from its registered specification can be unlawful, so verify current requirements with your RTO before modifying.
- Notify your insurer of significant modifications in writing — undisclosed changes can lead to claim denial.
- Suspension modifications may limit warranty on modified components, steering, suspension and driveline — check with your manufacturer.
- Watch for steering wander or shimmy at highway speed after lifting — investigate immediately before further use.
Informational guidance only — not professional advice or a safety guarantee. Follow your vehicle and component manufacturers' instructions, verify against current local regulations, and consult a qualified specialist for safety-critical work.
Where to next
Tyre Advisor
A bigger lift unlocks larger tyres — find the right size and type.
Wheel Advisor
Match rim width and offset to your new tyre size after lifting.
Suspension Hub
Brands, kits and tuning guides for a complete suspension setup.
Lift Kit Hub
Browse lift kits by vehicle, height and brand.
Build Advisor
Plan your whole build — tyres, lift, suspension and recovery.
Buy it · get it installed
Advanced technical notes — the complete India lift-kit reference(deep dive)
The complete India lift-kit reference
Lift kits for India — suspension vs body vs leveling, choosing height for tyre clearance, supporting mods, geometry effects, and RTO/ARAI legality & insurer disclosure.
Key takeaways
- A suspension lift is a system, not a single part — skipping any mandatory supporting mod (diff drop, caster correction, extended brake lines, sway bar links) converts a performance upgrade into a safety hazard. Every component in the kit exists for a specific engineering reason.
- India's Motor Vehicles Act prohibits unauthorized height modifications; no specific millimetre exemption exists in published law. Obtain written RTO approval before installation, disclose to your insurer in writing, and re-aim headlights to ARAI AIS-008 standard post-install. Body lifts carry the same unauthorised-alteration exposure as any structural change with no off-road benefit, so are strongly discouraged.
- Every inch of lift raises your centre of gravity, lowering the Static Stability Factor and increasing rollover risk. Compensate with negative-offset wheels to widen track, match spring rate to maximum loaded expedition weight, and never mount heavy roof loads on vehicles lifted beyond 2 inches without explicit SSF verification.
- Wheel offset is as important as lift height for tyre fitment. Specify wheels (typically -12 to -18 offset for off-road) before selecting tyre size. A wider-offset wheel can enable a larger tyre on less lift — which is safer, cheaper, and carries lower legal risk.
- India-specific conditions demand specific responses: coastal and monsoon environments require nitrided or stainless shock absorbers (₹15,000–20,000 premium worth paying); imported kits carry 4–8 week lead times and 30–50% cost premiums; installation quality varies widely — prioritise shops with documented prior lift kit experience over lowest-cost quotes.
- The total cost of a correctly installed 2-inch lift on a Thar is approximately ₹1,40,000–1,75,000 (kit + diff drop + labour + alignment + brake line check + headlight re-aim) — not the kit sticker price alone. Budget for the complete build, not the catalogue line item.
- If a lifted vehicle develops death wobble, brake fade, CV clicking, or violent bump steer on the trail: reduce speed immediately, do not fight the symptom with force, stop safely, diagnose the root cause before continuing. Each symptom maps to a specific missed or failed supporting modification — the emergency section of this guide provides the diagnostic map.
Lift Kits in India: What You Are Actually Buying
A lift kit is not a single product. It is a system of interdependent modifications that raises your vehicle's ride height, increases ground clearance, and — when done correctly — improves off-road capability. When done incorrectly, it introduces rollover risk, brake failure, CV joint destruction, and legal jeopardy that can result in your registration being cancelled.
India's off-road ecosystem is uniquely demanding: monsoon-saturated trails, coastal salt corrosion, altitude extremes in Ladakh and the Northeast, and a regulatory framework that treats unauthorized height modifications as criminal offences under the Motor Vehicles Act, 1988. A lift kit that works out of a US or Australian catalogue does not automatically translate to a safe, legal, durable outcome here.
This guide covers everything a Thar, Gurkha, Jimny, Fortuner, or Hilux owner needs to know before spending a rupee: lift types, heights, supporting mods, India-specific legality, rollover physics, per-vehicle fitment, common mistakes, and a decision framework to help you choose the right lift for your actual use case.
A lift kit fundamentally changes how your vehicle brakes, steers, and resists rolling over. Raising ride height raises the centre of gravity and directly increases rollover risk, lengthens braking distances, and alters steering and driveline behaviour. None of this is cosmetic.
A lift is safe ONLY when every dependent system is addressed together: brake lines and ABS sensor wiring must have enough length and slack at full suspension droop and full steering lock (verify physically — a line that goes taut or chafes will fail); bump steer must be corrected (caster plates / adjustable control arms / tie-rod geometry); driveline and CV/U-joint angles must be brought back into range (diff drop on IFS vehicles); and the vehicle must receive a professional four-wheel alignment and headlight re-aim after the work.
Use matched components designed to work together — never mix-and-match springs, shocks, spacers, and arms by guesswork. Installation, alignment, and headlight aim must be done by a qualified professional, and the geometry checked before the vehicle returns to the road.
This guide is general educational information, not professional, engineering, legal, or insurance advice. Figures, prices, and part references are indicative only and must be verified against the kit manufacturer, a competent installer, your RTO, and your insurer for your exact vehicle and year. You are responsible for the legality, safety, and roadworthiness of your vehicle — you assume all risk for any modification you make.
The Four Types of Lift: What They Do and How They Compare
Not all lifts are created equal. The four categories differ fundamentally in where they add height, what they improve, and what risks they introduce. Understanding this matrix before you buy prevents expensive mistakes.
Lift Type Head-to-Head
- Ground Clearance
- 9
- Suspension Travel
- 9
- Ride Quality
- 7
- Geometry Impact
- 5
- Off-Road Suitability
- 10
- India Legality
- 5
- Cost (Relative)
- 4
Replaces springs, shocks, brackets. Improves everything but requires the most supporting mods and highest cost. The correct choice for serious off-road use.
- Ground Clearance
- 5
- Suspension Travel
- 1
- Ride Quality
- 2
- Geometry Impact
- 2
- Off-Road Suitability
- 1
- India Legality
- 1
- Cost (Relative)
- 8
Spacers between frame and body only. Raises appearance, not capability. Higher CoG with no suspension improvement, and the same MV Act unauthorised-alteration exposure as any structural change. Avoid.
- Ground Clearance
- 4
- Suspension Travel
- 3
- Ride Quality
- 6
- Geometry Impact
- 6
- Off-Road Suitability
- 3
- India Legality
- 6
- Cost (Relative)
- 9
Front-only raise (1–2 inches) to correct factory nose-down rake. Corrects caster slightly. Minimal off-road benefit. Simplest and cheapest legal option.
- Ground Clearance
- 6
- Suspension Travel
- 4
- Ride Quality
- 5
- Geometry Impact
- 4
- Off-Road Suitability
- 5
- India Legality
- 5
- Cost (Relative)
- 7
Sits atop strut or under coil spring. Does not extend shock travel — reduces droop unless paired with longer shocks. Budget entry point for mild off-road.
A body lift raises the body away from the frame using spacers. It increases your centre of gravity (raising rollover risk) without any improvement in suspension travel, caster angle, or roll centre — the result is a vehicle that is easier to roll, no better at braking, and no more capable off-road than stock. Because it is still a structural/specification change relative to the registered vehicle, it carries the same MV Act §52/§190 exposure as any unauthorised alteration (see the legality section), with none of the off-road benefit. The cost is not trivial either. There is no good reason to fit one — choose a properly engineered suspension lift instead, and confirm the legal position for your vehicle with your RTO.
Lift Heights, Tyre Clearance, and the Supporting Mods You Cannot Skip
Each lift height unlocks a specific tyre size range, but every increment also mandates supporting modifications. The table below shows what you gain, what you must add, and what it will cost in India. Skipping any mandatory mod in the right column is a reliability or safety failure.
| Lift Height | Ground Clearance Gain | Safe Tyre Range | Mandatory Supporting Mods | India Kit Cost (Approx) | ARAI / RTO Status |
|---|---|---|---|---|---|
| 0.5–1 inch (12–25 mm) | +12–25 mm | Stock to 31 inch | Wheel alignment check only | ₹50,000–80,000 | Low risk; check local RTO |
| 2 inch (50 mm) | +50 mm | 32–33 inch | Caster plates, alignment, diff drop (if IFS), brake line check, extended sway bar links | ₹80,000–1,50,000 | At the threshold; obtain RTO approval before installation |
| 3 inch (75 mm) | +75 mm | 33–34 inch (35 inch with offset wheels) | Caster correction, diff drop kit, extended/verified brake lines, new upper control arms, extended sway bar links, headlight re-aim | ₹1,50,000–2,50,000+ | Almost certainly requires ARAI inspection + RC amendment; do not skip |
| 4 inch (100 mm+) | +100 mm+ | 35 inch+ | All of the above plus extended tie rods, full-length shocks, driveshaft CV inspection, potentially custom control arms | ₹2,50,000+ (full build) | Requires formal ARAI certification; consult engineer; high rollover risk without full geometry correction |
Costs are kit + labour estimates as of 2025–2026. Tyre diameters are approximate.
Some forums claim lifts under 50 mm (2 inches) are automatically legal. This is not accurate. The Motor Vehicles Act does not publish a specific millimetre threshold. The 50 mm figure is an informal community estimate of where RTO enforcement typically begins. Any lift that changes ground clearance materially requires RTO scrutiny. Treat the threshold as a guide for risk level, not as a legal exemption.
Choosing the Right Lift: A Decision Framework
Use this decision tree to identify the appropriate lift height and kit type for your actual use case, budget, and vehicle. Each path ends with a recommended lift level and the non-negotiable supporting mods for that choice.
Lift Kit Selector — India Off-Road Context
What is your primary use case?
What Happens to Your Vehicle's Geometry — and How to Fix It
Every suspension lift changes the angular relationship between your vehicle's frame, suspension arms, steering components, and driveshaft. These are not cosmetic changes — they directly affect steering feel, braking, tyre wear, and component life. Understanding each effect tells you which supporting mods are mandatory versus optional.
| Geometry Parameter | What Changes After Lift | Risk if Uncorrected | Correction Required | Lift Threshold That Triggers This |
|---|---|---|---|---|
| Caster Angle | Becomes more negative as control arms angle down; stock positive caster (3–6 degrees) reduced | Increased steering effort; wander at highway speeds; potential bump steer | Caster correction plates or adjustable upper control arms | 1.5 inches+ |
| Bump Steer | Tie rod angles diverge from control arm arc; toe changes during jounce and rebound | Dangerous unpredictable steering input on rough terrain — hands pulled off wheel | Extended tie rods or tie rod drop brackets to restore parallelism | 2 inches+ |
| Roll Centre | Rises with suspension; increases cornering stiffness but amplifies body lean asymmetry | On uneven terrain, asymmetric loading causes lean toward rollover side | Wider track (offset wheels) partially compensates; avoid aggressive cornering on cambered surfaces | Any lift |
| Driveshaft / CV Angle | Axle drops relative to diff; angle exceeds safe operating range | Accelerated CV joint wear leading to premature failure (timeline varies by angle severity, joint quality, and intensity of use); vibration; drivetrain noise | Differential drop kit (moves diff housing down 1–2 inches, restoring angle) | 2 inches+ (IFS vehicles) |
| Brake Line Reach | Suspension articulates further from frame; stock rubber hoses lose slack | Line rupture under full articulation; total brake failure | Bracket relocation (2–2.5 inches); extended stainless-steel brake lines (3 inches+) | 2 inches+ |
| Headlight Aim | Vehicle pitch angle increases; beam points higher than stock | Glare for oncoming drivers; ARAI AIS-008 non-compliance; reduced forward illumination | Re-aim headlights post-install; standard aim -2% to -2.5% per ARAI AIS-008 | Any suspension lift |
| Sway Bar Link Length | Stock links bind before full suspension travel | Sway bar limits suspension articulation; defeats purpose of lift | Extended drop sway bar links or adjustable end links | 1.5 inches+ |
Independent front suspension vehicles (Mahindra Thar 2020+, Suzuki Jimny, Toyota Fortuner, Toyota Hilux) use CV-axle half-shafts. These joints are designed to operate within a specific angular range. After a 2-inch lift, the diff stays high while the axle hangs lower, creating an angle that accelerates CV joint wear dramatically. Without a diff drop kit, premature CV joint failure is a documented consequence of hard off-road use at excessive axle angles — the exact timeline varies with angle severity, joint quality, and intensity of use, but failure within the first season of genuine off-road use is a real and reported outcome. A diff drop kit costs ₹8,000–12,000 and takes two hours to install. It is not optional.
At 2–2.5 inches of lift, relocating the frame anchor bracket 1–2 inches downward typically provides adequate slack. At 3 inches and above, extended stainless-steel brake lines are mandatory. Test full steering lock and maximum suspension droop before finalizing any brake line decision. Shops in India frequently omit this step to save ₹5,000–10,000. A ruptured brake line at trail speed costs lives — not components.
India Legality: RTO, ARAI, Insurance, and What Happens If You Skip Approval
This is not optional reading. Lift kits in India exist in a regulated space where unauthorized installation is a criminal offence, not a civil infraction. The consequences extend to your registration certificate, insurance coverage, and personal liability in accident claims.
Altering a vehicle's structure or specifications without authorisation is restricted under the Motor Vehicles Act, 1988. Section 52 prohibits altering a vehicle so that its particulars differ from those entered in the registration certificate, and Section 190 penalises using a vehicle in an unsafe or non-compliant condition. In its 2019 ruling — Regional Transport Officer & Ors. v. K. Jayachandra & Ors., Civil Appeals Nos. 219–222 of 2019, AIR 2019 SC 362, (2019) 3 SCC 722, decided 9 January 2019 — the Supreme Court of India held that no vehicle can be so altered that its particulars are at variance with those originally specified by the manufacturer, and that no structural alteration deviating from the homologated specification is permitted unless expressly authorised — large lifts and other structural changes fall squarely within this restriction.
Practical consequences: large lifts and structural alterations require prior RTO approval (and, where the height/structure change is significant, ARAI or designated-agency assessment) before the vehicle is driven on public roads. Separately, you MUST disclose any modification to your motor insurer in writing and obtain a written endorsement — an undisclosed modification can render your cover void, leaving you personally liable for third-party and own-damage claims and exposed to penalties under the MV Act.
Enforcement, accepted limits, and process vary by RTO district and change over time. Verify the current rules with your own RTO and insurer, and treat any specific number quoted in this guide as indicative only — confirm it against the official MoRTH / CMVR position before acting.
Any modification that changes a vehicle's ground clearance, dimensions, or structural specifications without prior RTO authorization is prohibited under Section 52 of the Motor Vehicles Act, 1988, and Rule 52 of the Central Motor Vehicles Rules, 1989. Penalties can include fines, registration suspension, RC cancellation, and an order to revert to stock (exact penalty amounts are set by the MV Act / state rules and change — verify the current figures). Body lifts carry the same unauthorised-alteration exposure at any height and offer no off-road benefit, so are strongly discouraged. Suspension lifts require written RTO approval before installation — not after.
Critical: No nationwide millimetre threshold is published. The commonly cited '50 mm threshold' is a community estimate of enforcement intensity, not a legal exemption. What is acceptable in one RTO district may be rejected in another. Verify with your specific RTO before proceeding.
| Compliance Item | Governing Rule | Who Approves | When Required | Consequence of Non-Compliance |
|---|---|---|---|---|
| Prior RTO application with technical drawings | MVA 1988 Section 52; CMVR 1989 Rule 52 | Regional Transport Office (your district) | Before any installation | RC suspension; fine (per MV Act / state rules — verify current amount); forced reversion |
| ARAI inspection for height change | CMVR 1989 Rule 52; ARAI certification process | ARAI (Pune) or designated testing agency | Required for structurally significant changes (case-by-case per RTO) | Modification deemed illegal; RC not updated |
| Updated Registration Certificate (RC) | MVA 1988; notification within 14 days of modification | RTO issues updated RC after approval | After ARAI certification; before driving on public roads | Vehicle operates on invalid RC; insurance void |
| Insurance policy disclosure and endorsement | Insurance Act; IRDAI guidelines | Your vehicle insurer | Before installation; written endorsement required | Claim denial for all accidents post-modification; potential fraud charge |
| Headlight re-aim to ARAI AIS-008 standard | ARAI AIS-008 Rev.2:2019 (-2% to -2.5% aim) | Authorized workshop or headlight calibration center | After any suspension lift that changes vehicle pitch | ARAI non-compliance; traffic violation; glare hazard |
| Body lift kit (any height) | Treated as a structural/specification change (MV Act §52) | Same RTO/ARAI pathway as any alteration — and no off-road benefit to justify it | Strongly discouraged at any height | Unauthorised-alteration exposure; registration cancellation risk; no capability gain |
| Verification of installer authorization | CMVR 1989 Rule 52 requires authorized workshops | Check for RTO/ARAI workshop authorization | Before booking installation | Modification invalid even if technically sound |
Complete every row before installing any lift kit. 'Case-by-case' means no blanket rule exists — you must apply.
Installing a lift kit without informing your insurer voids your comprehensive and third-party coverage. If you are involved in an accident post-modification, the insurer will investigate vehicle modifications as standard practice. An undisclosed lift kit is grounds for total claim denial, leaving you personally liable for all third-party damages. Inform your insurer in writing before installation and obtain a written endorsement. Expect premiums to increase.
ARAI (and other designated testing agencies) operate the formal type-approval / certification process relevant to vehicle modifications in India. Do not assume any given retrofit suspension kit carries valid ARAI homologation — in practice most owners installing a lift will need to pursue individual approval through their RTO rather than rely on a pre-approved kit, but you must verify the certification status of your specific kit before purchase rather than taking it on trust. Contact ARAI through the official channels listed on its website (araiindia.com) to confirm status, and never rely on a vendor's claim of 'ARAI approved' without a written certificate number you can check.
Centre of Gravity, Rollover Physics, and the Safety Trade-Off
Every lift kit raises your vehicle's centre of gravity (CoG). Physics converts this directly into increased rollover risk. Understanding the math helps you make an informed choice about how much lift is safe for your driving environment.
| SSF Range | Star Rating Equivalent | Rollover Risk | What This Means in Practice |
|---|---|---|---|
| ≥ 1.5 | 5-star | < 10% | Safe for highway emergency manoeuvres; low roll tendency in monsoon conditions |
| 1.3–1.49 | 3–4 star | 10–20% | Acceptable for moderate off-road; avoid high-speed cornering; be cautious on cambered trails |
| 1.1–1.29 | 2 star | 20–30% | High roll tendency; unsuitable for aggressive off-road use at speed; no passengers in rear during difficult trails |
| ≤ 1.04 | 1 star | ≥ 40% | Extreme risk; never acceptable; typically reached only with body lift + heavy roof loads or irresponsible 4+ inch lifts without track widening |
SSF = Track Width / (2 × CoG Height). Higher SSF is safer. Each inch of lift lowers SSF by reducing the denominator ratio.
India's monsoon season creates cambered, slippery surfaces where lifted vehicles with degraded SSF are at acute risk. Similarly, Himalayan switchbacks combine camber, altitude (affecting tyre grip), and tight radii — exactly the conditions where a raised CoG kills. If you lift 3 inches or more, widen your track with negative-offset wheels (-12 to -18 offset) to partially compensate. Never carry a roof tent or heavy roof-mounted load on a vehicle lifted beyond 2 inches without explicit SSF verification from an engineer.
Increasing track width raises the SSF numerator, compensating for the increased CoG height from a lift. Aftermarket off-road wheels with -12 to -18 offset push the tyre outward by 12–18 mm per side (24–36 mm total track increase), partially offsetting the SSF loss from a 2-inch lift. This is why experienced builders combine lift kits with wider-offset wheels rather than running stock wheels at stock track width.
Per-Vehicle Fitment Guide: Thar, Jimny, Gurkha, Fortuner, Hilux
Each vehicle has a different suspension architecture, stock clearance, and kit ecosystem in India. The table below consolidates verified fitment data for the five most common lifted platforms.
| Vehicle | Suspension Type | Stock Ground Clearance | Recommended Lift | Safe Tyre Size at That Lift | Verified Kit Options (India) | Price Range (Kit Only) | Diff Drop Needed? | Key Caution |
|---|---|---|---|---|---|---|---|---|
| Mahindra Thar (2020+) | IFS front, multi-link rear | 226 mm | 2–3 inch | 32–33 inch (245/75R16 or 255/65R18) | Nitrogen-gas monotube shock kit (₹1,05,000–1,33,500); budget shock-only 2-inch kit (₹24,000–50,000 shocks only); full geometry 3–3.5 inch kit with UCA/diff-drop/Panhard (₹1,10,000+) | ₹24,000–1,33,500 | Yes at 2+ inch | IFS requires full geometry correction at 3 inch; upper control arm replacement typically included in full geometry kits |
| Suzuki Jimny (2023+) | 5-link rigid front and rear | 210 mm | 1.5–2 inch | 215/75R15 confirmed; 235/75R15 possible (may need inner arch trim) | Nitrogen-gas monotube shock lift kit from specialist overland suspension makers (₹1,00,000–1,30,000 approx — confirm current price with supplier) | ₹1,00,000–1,30,000 | Not required (solid axle) | Rubbing at full compression possible even when on-road clearance looks safe; test loaded before committing |
| Force Gurkha (BS6) | Rigid solid-axle front and rear | 220 mm | 1.5–2 inch | 30–32 inch | Blue Garage Bumblebee strut lift (₹19,000–30,000 bolt-on); custom shop solutions | ₹19,000–80,000 | Not required (solid axle) | Few dedicated kits available; custom solutions require ARAI pre-approval; verify geometry independently |
| Toyota Fortuner (2009–2016) | Double wishbone IFS, 4-link rear | 222 mm | 2 inch | 32–33 inch | Nitrogen-gas monotube shock kits (₹70,000–1,25,000 approx by year); foamcell or high-spec foamcell shock kits (₹1,50,000–3,15,000 depending on spec and year) | ₹70,000–3,15,000 | Yes at 2+ inch | Wide model-year variation in kit pricing; confirm exact year and India-spec fitment with the kit supplier before ordering |
| Toyota Hilux (2022+) | Double wishbone IFS, leaf spring rear | 295 mm (stock — highest in class) | 1–2 inch only (already very capable stock) | 33 inch (may need minor fender relief) | Limited verified India kits available at time of writing; confirm current availability with specialist suspension retailers before planning | Confirm with retailer | Yes if IFS front lifted 2+ inch | High stock clearance means aggressive lifts rarely justified; confirm kit availability before planning |
| Mahindra Gypsy / Bolero (older models) | Solid axle or leaf spring | 180–210 mm (varies by variant) | 2–3 inch | 30–32 inch | Local workshop solutions; verify per RTO | ₹50,000–1,20,000 (custom) | Typically not required (solid axle variants) | Older vehicles have corrosion vulnerability; inspect frame and brake lines before any lift work |
Kit names, options, and price ranges below are indicative and change frequently — verify the exact kit, part number, and current price with the manufacturer or installer for your specific vehicle and year before ordering. Labour is additional (typically a few thousand rupees, confirm locally).
Installation: What a Correct Lift Kit Install Looks Like
A professionally installed suspension lift follows a specific sequence. Deviating from this order or skipping steps causes the geometry errors that make lifted vehicles dangerous. Use this as both a reference and a way to audit a workshop before you hand over your vehicle.
Suspension Lift Installation Process (2–3 Inch, IFS Vehicle)
Preparation
1Pre-Work: Document Stock Measurements
Measure and record: ride height at all four corners, caster angle, toe setting, headlight aim angle, brake line routing and slack. Photograph everything. This baseline is essential for verifying correct post-install geometry.
Legal
2Obtain RTO Pre-Approval (Before Any Wrenching)
Submit technical drawings and modification intent to your RTO. Do not install first and seek approval later — vehicles can be refused RC amendment retroactively. Insurance disclosure should happen at this stage.
Installing before approval creates a vehicle you cannot legally drive, register, or insure.
Disassembly
3Vehicle Raise and Component Removal
Vehicle goes on a four-post lift or axle stands (never a scissor jack for full disassembly). Remove wheels. Disconnect sway bar links, brake line routing brackets, and shock absorber mounts. Remove stock coil springs and shocks as a pair.
Core Installation
4Install New Coil Springs and Shock Absorbers
Install lift-height coil springs. Install new extended shock absorbers (must be 1.5–2 inches longer in travel than stock per inch of lift). Torque to manufacturer spec — under-torqued mounts work loose on corrugated Indian roads.
Drivetrain
5Install Differential Drop Kit (IFS Vehicles)
Re-locate the front differential downward using the drop brackets included in the kit. This restores CV axle angle to safe operating range. Verify CV angle visually — should appear close to horizontal, not sharply angled.
Skipping this step on IFS vehicles at 2+ inches causes accelerated CV joint wear and premature failure — the timeline varies with angle severity and use intensity, but failure within the first season of hard off-road use is a well-documented outcome.
Geometry
6Install Caster Correction Plates or New Upper Control Arms
Install caster correction plates (shimmed into the upper strut or control arm mount) or replace upper control arms entirely (included in premium kits like Dr. Nano 3–3.5 inch). Verify caster is restored to stock specification (3–6 degrees positive).
Safety Systems
7Replace or Verify Sway Bar Links and Brake Lines
Install extended sway bar drop links. Check brake line routing at full droop — lines must have slack and must not contact sharp edges. At 3 inches+, install extended stainless brake lines. Photograph all routing post-install.
A brake line that chafes on a chassis edge will fail on a rough trail. No exceptions.
Reassembly
8Reinstall Wheels and Lower Vehicle
Reinstall wheels at correct torque. Lower vehicle slowly. Check that suspension settles correctly — no binding, no contact between components at ride height.
Post-Install
9Wheel Alignment and Caster Verification
Take vehicle to a 4-wheel alignment center with a Hunter or equivalent machine. Set toe, caster, and camber to specifications provided by the lift kit manufacturer. This is not optional — misaligned geometry accelerates tyre wear and creates handling unpredictability.
- 10
Headlight Re-Aim to ARAI AIS-008 Standard
Re-aim headlights to -2% to -2.5% slope per ARAI AIS-008. Use a headlight calibration wall or workshop aimer. Document the new aim angles for insurance and RTO records.
Validation
11Road Test and Loaded Test
Road test: 20 km on varied surfaces including rough/corrugated road. Check for vibration (driveshaft angle issue), bump steer (tie rod correction needed), sway bar bind (link length issue). Load the vehicle to typical expedition weight and test full suspension droop to confirm no brake line or arch contact.
Do not skip the loaded test. Many fitment issues only appear under real-world weight.
25 Mistakes India Lift Kit Buyers Make (and How to Avoid Them)
These are the most common errors observed in India's 4x4 community, ranging from immediately dangerous to expensively frustrating.
| # | Mistake | Why It Happens in India | Consequence | Severity |
|---|---|---|---|---|
| 1 | Skipping diff drop kit on IFS vehicles | Shops omit ₹8,000–12,000 component to lower quote | Premature CV joint failure (timeline varies with angle severity, joint quality, and use intensity; typically within first season of hard off-road use) | Critical |
| 2 | Not verifying brake lines at full droop | Looks fine at static ride height; only fails at articulation | Total brake failure on trail | Critical |
| 3 | Buying a body lift to save money | ₹40,000–60,000 vs ₹1,50,000 for suspension kit | Higher CoG, illegal, no off-road benefit | Critical |
| 4 | Installing before RTO approval | 'I'll sort it later' attitude | RC cancellation; uninsured vehicle; fine | Critical |
| 5 | Not disclosing to insurer | Assumption that insurer won't notice | All claims denied post-accident; personal liability | Critical |
| 6 | Skipping caster correction at 2+ inches | Not included in budget kits; shop doesn't flag it | Bump steer; dangerous steering input on rough terrain | Critical |
| 7 | Choosing lift height based on YouTube videos from US/Australia | Content is accessible; India conditions differ | Wrong kit for Indian roads, corrosion, legality | Major |
| 8 | Not re-aiming headlights post-install | Nobody mentions it; ARAI compliance unknown | AIS-008 violation; glare hazard; traffic violation | Major |
| 9 | Running stock shocks with coil spacers | Spacer kit is cheap; shocks 'seem fine' | Reduced suspension travel; bouncy dangerous ride | Major |
| 10 | Exceeding ±3% tyre diameter change | Want bigger tyres; don't check math | Speedometer error; transmission stress; handling change | Major |
| 11 | Buying imported kits without verifying India compatibility | Kit fits same model in another market | Wrong spring rates; wrong mounting geometry for India-spec vehicle | Major |
| 12 | Not checking wheel offset before tyre selection | Tyre size chosen before wheels | Rubbing at full compression; arch contact on trails | Major |
| 13 | Using a shop with no prior lift kit experience | Cheapest quote wins the job | Geometry errors; missed brake lines; alignment failure | Major |
| 14 | Skipping 4-wheel alignment post-install | 'Alignment can wait' | Rapid uneven tyre wear; handling instability | Major |
| 15 | Assuming a global suspension catalogue's part numbers match India-spec vehicles without verification | Catalogues are typically based on international-market vehicles | Incorrect spring rate for India-spec weight; poor ride | Major |
| 16 | Installing 3-inch+ lift without ARAI consultation | Cost and time avoidance | Illegal vehicle; ARAI enforcement catch | Major |
| 17 | Ignoring monsoon corrosion on new suspension parts | Shocks look fine in dry season | Standard steel shocks corrode aggressively in India; ₹15,000–20,000 premium for nitrided/stainless shocks is worth it | Major |
| 18 | Loaded test skipped | Time pressure; 'road test was fine' | Brake line contact or arch rub only appears under load | Major |
| 19 | Trusting vendor claims of ARAI approval without certificate | Vendor says 'ARAI approved' to close sale | No such mass-market approval exists; kit is illegal | Major |
| 20 | Not budgeting for hidden costs | Sticker price of kit looks manageable | Labour + alignment + brake lines + diff drop adds ₹25,000–40,000 to kit cost | Minor |
| 21 | Buying cheapest strut spacer without extended shocks | Strut spacers are ₹8,000–15,000 vs full kit | No extra suspension travel; worse ride quality than stock | Minor |
| 22 | Selecting spring rate for empty vehicle, not loaded expedition weight | Kit chosen based on unladen test drive | Excessive sag under load; geometry deteriorates under weight | Minor |
| 23 | Not checking parts availability and lead time before planning a trip | Kit ordered late | Imported suspension kits typically carry 4–8 week lead times; stranded before expedition | Minor |
| 24 | Skipping sway bar link replacement | Not in budget kit; overlooked | Sway bar limits suspension articulation; defeats purpose of lift | Minor |
| 25 | Expecting fuel economy to be unchanged | Lift 'should not affect fuel' | 1–2 mpg per inch of lift + weight penalty; budget for increased running costs | Minor |
Severity: Critical = safety/life risk; Major = mechanical failure or legal jeopardy; Minor = performance or cost waste.
Expert Tips: What Experienced India Off-Road Builders Know
These insights come from experienced builders who have made expensive mistakes so you do not have to. Each one is specific to the Indian operating environment.
The shock absorber determines how the suspension behaves — the spring only determines ride height. In India's budget-constrained market, buyers often buy cheap spacer kits to save money on shocks and then wonder why the ride is worse than stock. Invest in quality nitrogen-gas or foamcell shocks. A good shock on a modest spring beats a tall spring on a poor shock every time.
Wheel offset is as critical as lift height for tyre fitment. Two identical vehicles with identical lifts can have completely different tyre fitment outcomes based on wheel offset. Specify your wheel offset (typically -12 to -18 for off-road use) before deciding on tyre size. A wider-offset wheel can enable a larger tyre on less lift — which is safer, cheaper, and more legal.
The rough rule that one inch of lift enables one inch of additional tyre diameter assumes standard wheel offset and adequate arch clearance. Your specific vehicle, arch design, and wheel choice can make this more or less conservative. Always test full suspension compression — loaded — before committing to a tyre size. Many Jimny owners find their 235s rub at full compression despite appearing fine on a flat road.
If you are building a Ladakh overlanding rig carrying two passengers, camping gear, recovery equipment, water, and fuel, your fully loaded vehicle weighs significantly more than the vehicle you test-drive at the shop. Specify spring rate based on your maximum expedition load. Undersized springs sag under load, pushing CV angles back into dangerous territory and reducing ground clearance by 25–40 mm at maximum load.
India's coastal regions — and any vehicle that sees heavy monsoon use — aggressively corrode standard carbon-steel shock bodies. The ₹15,000–20,000 premium for nitrided-piston or stainless-body shocks pays for itself in the first monsoon season. Standard shocks from imported kits are not rated for India's coastal or high-humidity operating environment without additional rust prevention treatment.
RTO approval processes vary enormously by district. Some RTOs are familiar with lift kit applications and have a process; others have never seen one and will refuse without clear technical documentation. Visiting the RTO with your kit's technical datasheet, proposed modification drawings, and a brief explanation before installation builds goodwill and avoids surprises. Owners who install first and apply for approval second routinely get refused — and face de-registration of an already-modified vehicle.
The price you see on a retailer website is the kit only. Add: labour ₹8,000–15,000; differential drop kit (if not included) ₹8,000–12,000; wheel alignment ₹2,000–3,000; extended brake lines (if needed) ₹5,000–10,000; headlight re-aim ₹1,000–2,000; tyres (if upgrading) ₹30,000–80,000 for a set of four. A ₹1,05,000 nitrogen-gas monotube kit for a Thar realistically costs ₹1,40,000–1,60,000 to properly install and complete.
Lift Kit Myths vs. Facts: Separating Engineering from Forum Fiction
India's 4x4 community is active and passionate, but social media consensus frequently diverges from engineering reality. These myth/fact pairs address the most dangerous misconceptions.
10 Lift Kit Myths India Builders Need to Unlearn
Myth: A 2-inch lift is always legal in India without approval.
Fact: No published Indian regulation exempts any specific lift height from RTO approval requirements. The 50 mm figure is an enforcement-intensity estimate, not a legal threshold. All lifts altering ground clearance materially require prior RTO authorization.
Myth: Body lift is a cheap way to get the same off-road benefit as a suspension lift.
Fact: Body lift adds height without improving suspension travel, caster, roll centre, or any handling parameter. It raises the centre of gravity without compensating improvements, worsening rollover risk. It provides zero genuine off-road capability improvement, and as a structural/specification change it carries the same MV Act unauthorised-alteration exposure as any lift — so it is strongly discouraged in India.
Myth: Spacer kits give you the same result as a full suspension kit at lower cost.
Fact: Spacer kits add height but do not extend shock travel. This reduces suspension droop — your articulation on obstacles decreases. Without matching extended shocks, a spacer kit produces a stiffer, less capable result than stock for off-road use.
Myth: My insurance won't know I've lifted the vehicle.
Fact: In the event of a claim, insurers routinely inspect the vehicle for non-standard modifications. An undisclosed lift kit provides grounds to void the entire claim under material non-disclosure. The risk is not getting caught — it is losing your insurance coverage precisely when you need it.
Myth: If the lift fits the Thar in Australia, it'll work the same on my India-spec Thar.
Fact: India-spec vehicles frequently differ in suspension tuning, spring rates, wheel specifications, and component weight from their international counterparts. Verify kit compatibility with the India-spec model year specifically, not the global catalogue.
Myth: Bigger tyres require a bigger lift.
Fact: Wheel offset is often as important as lift height for tyre fitment. Negative-offset aftermarket wheels (-12 to -18) push the tyre outward, enabling a larger tyre size on the same or smaller lift. Spec your wheels before assuming you need a bigger lift for a specific tyre size.
Myth: After a lift, my speedometer is still accurate.
Fact: Increasing tyre diameter beyond ±3% of stock causes speedometer error proportional to the diameter change. A 33-inch tyre on a vehicle specced for a 31-inch tyre shows a speed approximately 6% lower than actual. This affects speeding compliance and GPS accuracy at highway speeds.
Myth: The diff drop is optional — I'll add it later if I have problems.
Fact: CV joint wear from incorrect angle is cumulative and not always immediately obvious. By the time you notice vibration or noise, the joint is already significantly damaged. At 2+ inches on IFS vehicles, the diff drop is a day-one installation requirement, not a deferred maintenance item.
Myth: A quality lift kit will not affect fuel economy.
Fact: Every inch of suspension lift costs 1–2 miles per gallon at highway speeds due to increased aerodynamic drag and the weight of the kit (100–300 lbs / 45–135 kg). Combined with a larger tyre upgrade, expect 10–25% higher fuel consumption depending on driving pattern.
Myth: The shop test-drove it and everything was fine, so I don't need the loaded test.
Fact: Brake line contact, arch rubbing, and suspension binding under load only appear at maximum suspension travel under maximum vehicle weight. The shop test-drive is unloaded and on smooth roads. Your expedition will be loaded, on corrugated gravel, at full articulation — exactly the conditions the loaded test replicates.
Frequently Asked Questions
Answers to the questions India's off-road community asks most often, based on verified data.
Lift Kit FAQ — India Off-Road Context
What lift kit should I consider for a Mahindra Thar 2021 for weekend off-roading?
For balanced weekend use, a quality nitrogen-gas monotube shock kit (2-inch) or a full geometry kit at 3–3.5 inches (which typically bundles upper control arms, diff drop, Panhard rod, and sway bar links) are the standard approaches. Both categories of kit are stocked by specialist India 4x4 retailers. Price figures change frequently — treat any number as indicative, confirm the current price and exact contents with the seller, then add a labour-plus-alignment-plus-brake-line allowance (commonly a few tens of thousands of rupees) on top of the kit price.
Is a 2-inch lift enough for Ladakh?
Yes, for most routes. Ladakh's primary challenge is altitude, dust, and loaded vehicle weight on high passes, not extreme articulation. A 2-inch lift with 32–33 inch tyres, correctly installed with diff drop and caster correction, handles the majority of Ladakh routes. What matters more is a high spring rate matched to your loaded weight, quality shock absorbers that don't fade under sustained use, and adequate ground clearance for river crossings. A 3-inch lift is justified only if you are taking technical off-road lines beyond the main routes.
Can I install a lift kit on my Suzuki Jimny?
Yes. The Jimny's solid-axle setup simplifies geometry significantly compared to IFS vehicles. With a 2-inch lift, confirmed fitment for 215/75R15 tyres is verified; 235/75R15 is possible but may require inner arch trimming. Nitrogen-gas monotube shock lift kits from reputable overland suspension makers are the primary category to look for — confirm current India availability and pricing (indicatively ₹1,00,000–1,30,000) with specialist retailers before ordering. Diff drop is not required on solid-axle Jimnys, but brake line verification at full droop is still mandatory. Test loaded at full compression before committing to 235s.
How much does a complete 2-inch lift cost for a Thar in India, total cost including everything?
Realistically: a quality nitrogen-gas monotube kit ₹1,05,000–1,33,500 (confirm current price with supplier), plus differential drop ₹8,000–12,000 (if not included), labour ₹8,000–15,000, alignment ₹2,000–3,000, extended brake lines (if needed) ₹5,000–10,000, headlight re-aim ₹1,000–2,000. Total: ₹1,29,000–1,75,500 for a properly completed install. Budget ₹1,50,000 as a working figure.
Will my insurance be affected by a lift kit?
Yes, significantly. You must disclose the modification to your insurer before installation and obtain written endorsement. Undisclosed modifications void all claims under material non-disclosure. Expect premium increases. Some insurers will decline to cover significantly lifted vehicles; others offer modified vehicle policies at higher premiums. Do not install first and disclose later — the disclosure must precede installation.
What is the difference between nitrogen-gas monotube, foamcell, and high-spec foamcell shock absorbers?
Nitrogen-gas monotube shocks use a pressurised nitrogen charge to prevent oil aeration — a good balance of on/off-road performance with strong heat dissipation, suitable for most India use cases. Foamcell shocks use a polyurethane foam cell instead of a gas separator; this prevents aeration and provides very consistent damping over sustained rough terrain — better for longer off-road stints. High-spec foamcell variants are rated for extreme terrain and expedition/commercial use. For most India weekend off-roaders, nitrogen-gas monotube shocks are sufficient and the most cost-effective entry point. Foamcell is justified for serious overlanding or sustained high-intensity use.
Does a Force Gurkha need a diff drop after a 2-inch lift?
The Force Gurkha uses a solid-axle (live-axle) setup, not independent front suspension. Solid-axle platforms drive the wheel through a simple propeller shaft to the differential on the axle itself — the axle and diff move together. A diff drop kit addresses the CV angle problem specific to IFS vehicles. The Gurkha does not have this geometry concern, so no diff drop kit is required. However, verify the specific variant — this applies to the standard Gurkha BS6 with solid axles.
What is the largest tyre I can fit on a Thar with a 3-inch lift?
33–34 inch tyres (approximately 838–864 mm diameter) are the verified safe range for a 3-inch lift. 35-inch tyres are possible with aftermarket negative-offset wheels (-15 or more) but require careful arch clearance validation at full compression. The stock 245/75R16 measures approximately 805 mm; staying within ±3% of this (781–829 mm) avoids speedometer and transmission stress. 33-inch tyres (838 mm) are approximately 4% over stock — a minor calibration consideration, not a dealbreaker, but worth noting.
How do I know if my brake lines need replacement after a lift?
With the vehicle on a lift and the suspension at full droop (wheels hanging), trace each brake line from the frame anchor to the caliper or wheel cylinder. The line must have visible slack — it should not be taut. At maximum steering lock (both directions), the line must not contact any moving component or sharp edge. At 2–2.5 inches of lift, bracket relocation typically provides enough slack. At 3 inches and above, extended stainless-steel lines are the standard recommendation. Never assume — physically verify at full droop.
How long does a professional lift kit installation take?
A full 2–3 inch suspension lift on an IFS vehicle (Thar, Fortuner) requires approximately 6–10 hours at a competent workshop: 2 hours for removal, 2 hours for installation, 1 hour for brake line and geometry check, 1 hour for alignment, and additional time for headlight re-aim and loaded test. Budget for a full day or leave the vehicle overnight. Any shop quoting less than half a day for a 2-inch+ IFS lift should be questioned closely about which steps they are skipping.
What causes death wobble, and can it happen after a lift kit?
Death wobble is a rapid, violent oscillation of the front axle/steering at speed, typically triggered by a bump or pothole. On lifted solid-axle vehicles, it is caused by worn or loose steering and suspension components (king pins, track bar, tie rod ends, drag link) that are now operating at altered angles with higher loads. On lifted IFS vehicles, a similar oscillation can result from incorrect caster angle (bump steer) or loose wheel bearings. A properly installed lift with correct caster correction, tight components, and correct alignment should not develop death wobble. If it appears post-install, inspect caster, track bar wear, and all steering joint condition immediately.
Can I use a leveling kit instead of a full suspension lift?
A leveling kit is the right choice if your goal is correcting the factory nose-down rake, achieving a level stance, and gaining 25–38 mm of front clearance without significant off-road capability improvement. It is not a substitute for a full suspension lift if you need genuine off-road articulation or want to fit significantly larger tyres. Leveling kits are the simplest, lowest-cost, lowest-risk lift modification and carry the least legal complexity. For daily drivers with occasional light off-road use, they are often the best answer.
Where can I buy verified lift kit parts in India?
Several established India 4x4 specialists distribute suspension and lift kits — search for authorised dealers and specialist 4x4 shops in your region and verify their credentials before ordering. Contact details, distributor status, and stock availability change over time, so confirm the current authorised retailer directly before ordering. Imported suspension brands are typically brought in from Australia or the US, generally with a multi-week lead time and a meaningful cost premium over their home-market retail price — get a firm quote and lead time in writing before committing.
Is a 3-inch lift safe for a vehicle that carries heavy passenger loads regularly?
A 3-inch lift with heavy loads requires a higher spring rate than the same lift for a solo driver. The combination of 3 inches of additional height and a full passenger load raises the centre of gravity substantially, lowering the Static Stability Factor. This is not automatically unsafe, but it requires: spring rate matched to maximum loaded weight, wider track (negative-offset wheels) to partially compensate SSF loss, and conservative driving — avoiding high-speed cornering, cambered surfaces, and aggressive trail lines when fully loaded. It also requires full ARAI scrutiny given the height and load combination.
My local RTO has never heard of a lift kit application. What do I do?
This is common. Approach the RTO with: a cover letter explaining the modification, the lift kit's technical datasheet (spring rates, height change, component list), photographs of the kit, and a summary of the safety supporting mods (diff drop, brake lines, caster correction). Frame it as a suspension component upgrade rather than a 'lift kit.' If the RTO requests an ARAI inspection, engage ARAI (or the designated testing agency the RTO names) through the official contact channels on araiindia.com. Bringing a certified workshop's endorsement letter strengthens the application. Patience and documentation are more effective than arguing about what is or is not on the rule sheet.
What should I check at the first service after a lift kit installation?
At 500–1,000 km post-install: re-torque all suspension fasteners (new components settle and loosen under load); recheck wheel alignment (geometry shifts as components bed in); inspect brake line routing under a full droop test; verify diff drop bracket bolts are tight; check for any new squeaks, vibrations, or steering deviation. A post-install check is not optional — it is the difference between a long-lasting build and an expensive rebuild.
Emergency Reference: Lift-Related Failures on the Trail
When something goes wrong on a trail with a lifted vehicle, fast correct diagnosis and response prevents a mechanical problem from becoming a rescue situation. Use these cards to identify what you are dealing with and what to do next.
Lift-Related Trail Failures: Identify, Respond, Recover
Death Wobble / Severe Steering Oscillation
Symptoms
- Violent rapid oscillation of the steering wheel, felt through hands and seat
- Typically triggered at a specific speed (60–90 km/h) or after hitting a bump or pothole
- May improve temporarily if you slow down; returns at the trigger speed
- Worse on corrugated surfaces; can appear suddenly on a vehicle that was previously fine
Do immediately
- Ease off the accelerator smoothly — do not brake hard, which can amplify oscillation
- Maintain firm two-handed grip on the wheel without fighting it
- Slow to below 40 km/h; oscillation should dampen at lower speeds
- Pull off the road safely and stop; do not continue driving at speed
Do NOT
- Do not brake hard during the wobble — this shifts weight forward and worsens oscillation
- Do not accelerate through it hoping it resolves
- Do not drive the vehicle at speed again until the root cause is identified and fixed
Recovery
- Inspect: track bar / Panhard rod ends for looseness or wear (most common cause on solid-axle lifted vehicles)
- Inspect: tie rod ends and drag link for play (grab and physically test for movement)
- Inspect: king pins and wheel bearings for looseness
- Check caster angle if recently lifted — incorrect caster amplifies wobble tendency
- If any component shows looseness or wear, trailer the vehicle; do not drive to workshop at speed
Call a pro when: Any death wobble that persists below 60 km/h, or that cannot be attributed to a specific worn component on inspection, requires a suspension specialist — not a general mechanic.
Brake Fade or Sudden Brake Pedal Loss (Brake Line Rupture)
Symptoms
- Pedal sinks to floor with reduced or no braking effect
- Soft or spongy pedal after articulation over an obstacle
- Visible brake fluid loss near rear wheel or along frame
- One side braking significantly harder than the other (partial line failure)
Do immediately
- Begin controlled deceleration immediately — use engine braking (downshift in manual; select L on automatic)
- Apply handbrake gradually and smoothly — not a sharp pull — to assist deceleration without rear wheel lockup
- Flash hazard lights; signal intention to stop to any following traffic
- Stop on the safest available surface; avoid stopping on camber or descent
Do NOT
- Do not pump a failed brake pedal — if a line has ruptured, pumping only loses the remaining fluid faster
- Do not attempt to drive to a workshop under your own power if brake pedal is at the floor
Recovery
- Inspect all four brake lines at their routing points — look for chafed, kinked, or severed lines particularly at suspension attachment points
- Check brake fluid reservoir level; a sudden drop confirms fluid loss
- If a specific wheel shows no resistance when rotated by hand (compared to others), the line to that wheel is suspect
- Vehicle must be trailered or flat-towed; do not drive with compromised brakes
- Root cause: extended brake lines not installed after 3-inch+ lift, or bracket relocation not done after 2-inch lift
Call a pro when: Brake system failure always requires a qualified mechanic before the vehicle returns to road or trail use. No trail-side repair substitutes for proper brake line replacement and pressure testing.
CV Joint Failure / Driveshaft Vibration
Symptoms
- Clicking or popping sound from front wheel area during turns, especially at low speed
- Vibration felt through floorboard or steering wheel at specific speeds (typically 60–100 km/h)
- Vibration worsens during acceleration or when turning under load
- Clunking or thudding when driving over bumps (more advanced failure)
Do immediately
- Reduce speed to below 60 km/h; vibration may diminish
- Avoid sharp acceleration or tight-radius turns, which stress a failing CV joint further
- Pull off the road and inspect the CV axle boot — if torn and grease has escaped, CV failure is imminent
- If the clicking is severe, engage 4WD-Low (if available) and proceed very slowly to safe ground
Do NOT
- Do not continue driving at speed with a clicking or vibrating CV — catastrophic joint separation can cause total loss of drive to that wheel
- Do not make repeated tight-radius turns on a suspected failing joint
Recovery
- On a 2WD vehicle with a failed front CV, the vehicle can sometimes limp slowly (under 20 km/h) on the undamaged axle if 4WD is not engaged
- On a 4WD vehicle in 4WD, a completely failed CV may lock the front axle; if so, disengage 4WD and use rear drive only to exit
- Root cause: diff drop kit omitted after 2-inch+ lift on IFS vehicle; CV joint operated at excessive angle until failure
- Full replacement of CV shaft (not just the joint) is typically required after a failure; verify differential drop is installed at the same time
Call a pro when: Any CV failure that results in loss of drive, complete clicking at all speeds, or vibration that cannot be managed below 40 km/h requires a drivetrain specialist. Verify diff drop kit installation status before replacing the CV — otherwise the replacement will fail on the same timeline.
Bump Steer / Uncontrolled Steering Input on Rough Terrain
Symptoms
- Steering wheel jerks or pulls sharply in one direction when hitting a bump or rut
- Vehicle tracks unpredictably on corrugated roads even at moderate speed
- Steering effort varies dramatically depending on road surface (not weather or tyre pressure related)
- Vehicle drifts direction when one wheel drops into a rut
Do immediately
- Maintain firm two-handed grip on the steering wheel at all times — do not lock elbows
- Reduce speed to a level where steering inputs are manageable — typically below 40 km/h on corrugated roads
- Avoid high-speed corrugated tracks; bump steer is dramatically worse at speed
- Signal to any convoy vehicles that you are reducing pace
Do NOT
- Do not attempt to fight the steering wheel with force — work with gentle corrections
- Do not drive at highway speeds on any rough surface until caster and tie rod geometry is corrected
Recovery
- Bump steer is a geometry problem, not a failure — the vehicle can be driven slowly and carefully off the trail
- Root cause: caster correction not installed after 2+ inch lift; tie rod drop brackets not fitted; existing tie rod ends worn and made worse by altered angles
- Fix requires workshop visit: caster correction plates or upper control arm replacement; possibly tie rod drop brackets
- Verify caster angle with an alignment machine post-fix; target 3–6 degrees positive caster
Call a pro when: Persistent bump steer after a lift is never self-resolving. If a suspension specialist has not corrected caster and tie rod geometry, the condition will worsen as components wear under abnormal load angles. Book a workshop visit before the next off-road trip.
Pre-Purchase and Pre-Install Checklist
Before spending money on any lift kit, verify every item on this list. A completed checklist is the difference between a successful build and an expensive, illegal, unsafe mistake.
The checklist below covers 14 critical verification points across legality, kit selection, supporting mods, installation, and post-install validation. Complete every item before your vehicle returns to the road or trail.
Sources & further reading
This guide is general educational information, not professional, engineering, legal, or insurance advice. Lift kits affect braking, steering, driveline angles, and rollover risk, and their legality depends on rules that vary by RTO district and change over time. Always verify the specific kit, supporting mods, prices, legal requirements, and insurer terms for your exact vehicle and year against the primary sources below and a competent professional installer before acting. You assume all risk for any modification you make.
Last reviewed: 2026-06-21. Figures, prices, kit names, and part references in this guide are indicative only and must be confirmed against the manufacturer, installer, your RTO, and your insurer.
- Lift-kit & vehicle manufacturer fitment specs and instructions
- Ministry of Road Transport & Highways (MoRTH) — Motor Vehicles Act / CMVR on alterations (https://morth.nic.in)
- Automotive Research Association of India (ARAI) (https://www.araiindia.com)
- Your insurer's policy terms on declared modifications
- Tyre & rim / driveline manufacturer guidance on angles and clearances